ESP32-S3 HA climate
A small temperature and humidity sensor that behaves like something you bought: plug it in, scan the QR code on its screen, and it shows up in Home Assistant.
flowchart LR
  SHT40 -->|I2C| ESP32[ESP32-S3]
  ESP32 -->|SPI| TFT[ST7789 screen]
  ESP32 -->|Wi-Fi| HA[Home Assistant]
What you'll end up with
-
Temperature and humidity
In Home Assistant, updated every 10 seconds.
-
A live screen
240×240 colour display with Wi‑Fi status and climate tiles. Turn it off from Home Assistant with Display.
-
Setup from your phone
Scan the code, pick your Wi‑Fi, done.
-
Settings that stick
Survive reboots and power cuts.
-
Factory reset
Hold BOOT for 5 seconds to start setup again.
-
No Wi‑Fi password in the firmware
Not in the code and not in this repo.
What the screen shows
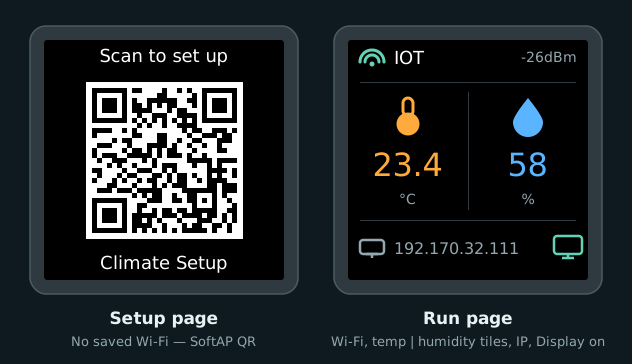
Mock-up from the firmware: SoftAP QR (no saved Wi‑Fi), then Wi‑Fi status, temp | humidity tiles, IP, and Display-on cue.
Parts
| Part | Notes | |
|---|---|---|
| ESP32-S3 N16R8 dev board | 16 MB flash, 8 MB PSRAM, USB-C | |
| SHT40 breakout | Temperature and humidity over I2C | |
| ST7789 240×240 display | Square 8-pin SPI module | |
| Breadboard and jumper wires | Any solderless breadboard | |
| USB-C data cable | Charge-only cables won't work | |
| A computer running Ubuntu 24.04 | Builds and flashes the firmware |
Wiring is split into short steps under Wire and validate. The full pin map is on Validate.
Tutorial
-
What each block of the firmware does.
-
Install ESPHome and compile.
-
Breadboard, SHT40, display, then a check.
-
Upload over USB and watch it boot.
-
Join Wi‑Fi, add to Home Assistant, test the reset.
The whole firmware is one file: firmware/climate.yaml.