5. Configure and test
Get the device onto your Wi‑Fi, add it to Home Assistant, and check that the settings stick and that the reset works.
What the screen shows
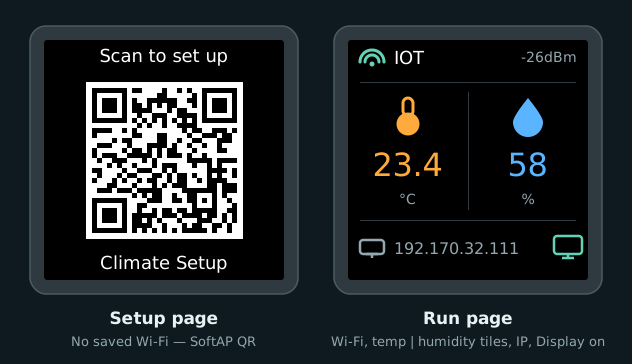
TFT layout from the firmware (no separate desk photo). Left: SoftAP QR. Right: run page — Wi‑Fi status, temp | humidity tiles, IP, Display-on cue. Live HA readings appear in the device-page screenshot below.
Connect to your Wi‑Fi
While the device has no saved network, the screen shows a QR code and the device broadcasts its own hotspot:
| Setting | Value |
|---|---|
| Hotspot name | Climate Setup |
| Hotspot password | setup1234 |
From your phone (QR code)
- Point your phone camera at the QR code on the screen and tap the Wi‑Fi prompt to join Climate Setup.
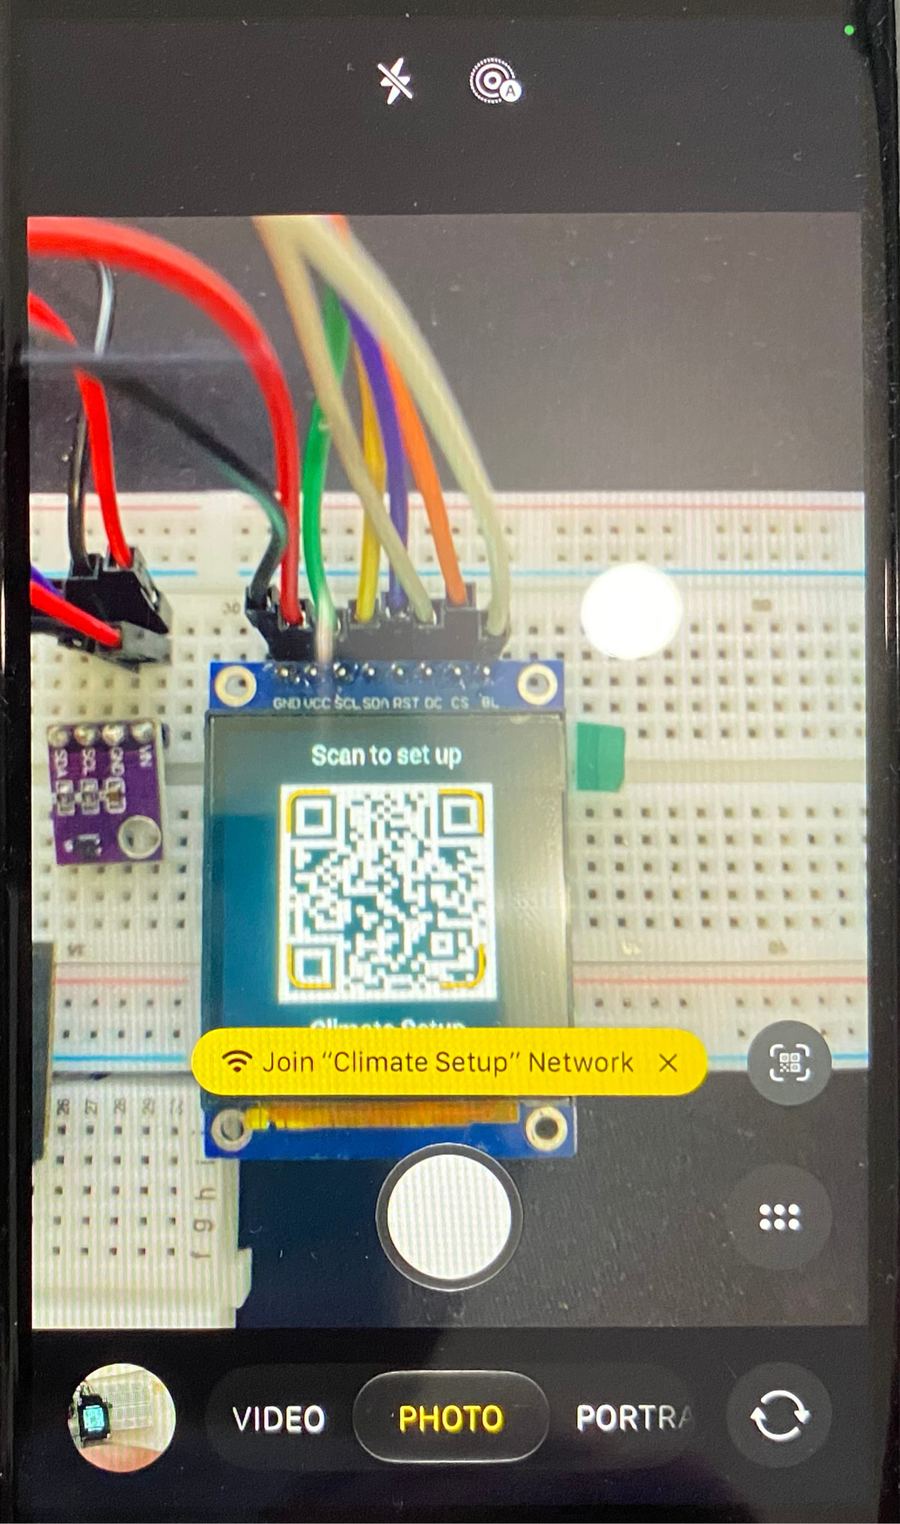
Scan the on-screen QR — the phone offers Join "Climate Setup" Network.
- A setup page opens automatically. If it doesn't, open
http://192.168.4.1in the browser.
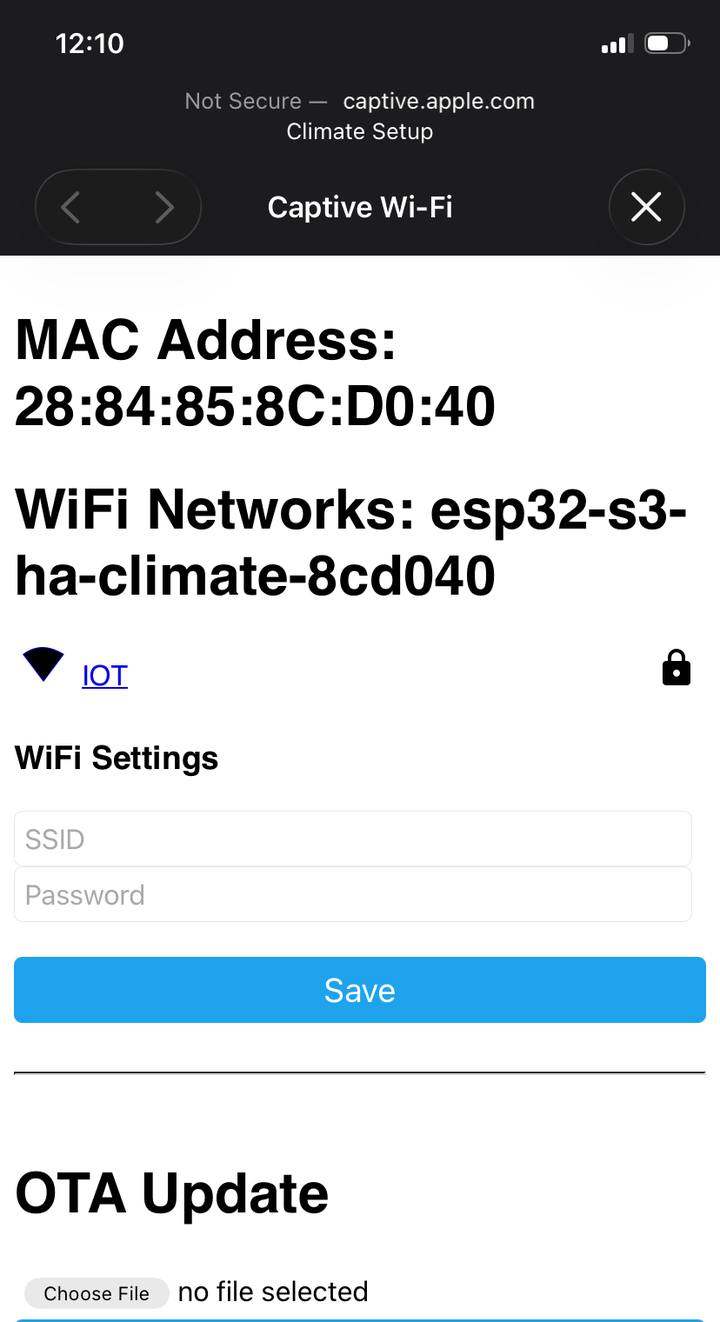
Captive portal — pick your home SSID (for example IOT), enter the password, and tap Save.
- After Save, wait for the device to join your network. SoftAP turns off and the screen switches to the readings page (Wi‑Fi status, temp | humidity tiles, IP).
After a successful join, the serial log looks like this (SSID and IP will differ on your network):
.venv/bin/esphome logs firmware/climate.yaml --device /dev/ttyACM0
…
[D][wifi:708]: Loaded settings: IOT
…
[I][wifi:1588]: - 'IOT' … Ch: 8 -26dB
[I][wifi:1250]: Connecting to 'IOT' …
[I][wifi:1732]: Connected
[D][wifi:1127]: Disabling AP
[C][wifi:1392]:   IP Address: 192.170.32.111
[C][wifi:1403]:   SSID: 'IOT'
  Hostname: 'esp32-s3-ha-climate-8cd040'
  Signal strength: -26 dB
…
Other onboarding (not in this guide)
The firmware also enables Improv over BLE and serial. This tutorial only documents the QR + captive portal path above.
Add it to Home Assistant
Once the device is on your network, Home Assistant normally finds it by itself:
- Go to Settings → Devices & services. A discovered ESPHome device appears at the top.
- Click Add and confirm. Home Assistant sets the device's encryption key as it adds it.
- Open the device page. You should see Temperature, Humidity, Display, Factory Reset, and Restart, plus Wi‑Fi signal and uptime under Diagnostic.
If nothing is discovered, add the ESPHome integration manually:
| Field | Value |
|---|---|
| Host | the device IP (from the log or your router), e.g. 192.170.32.111 |
| Port | 6053 |
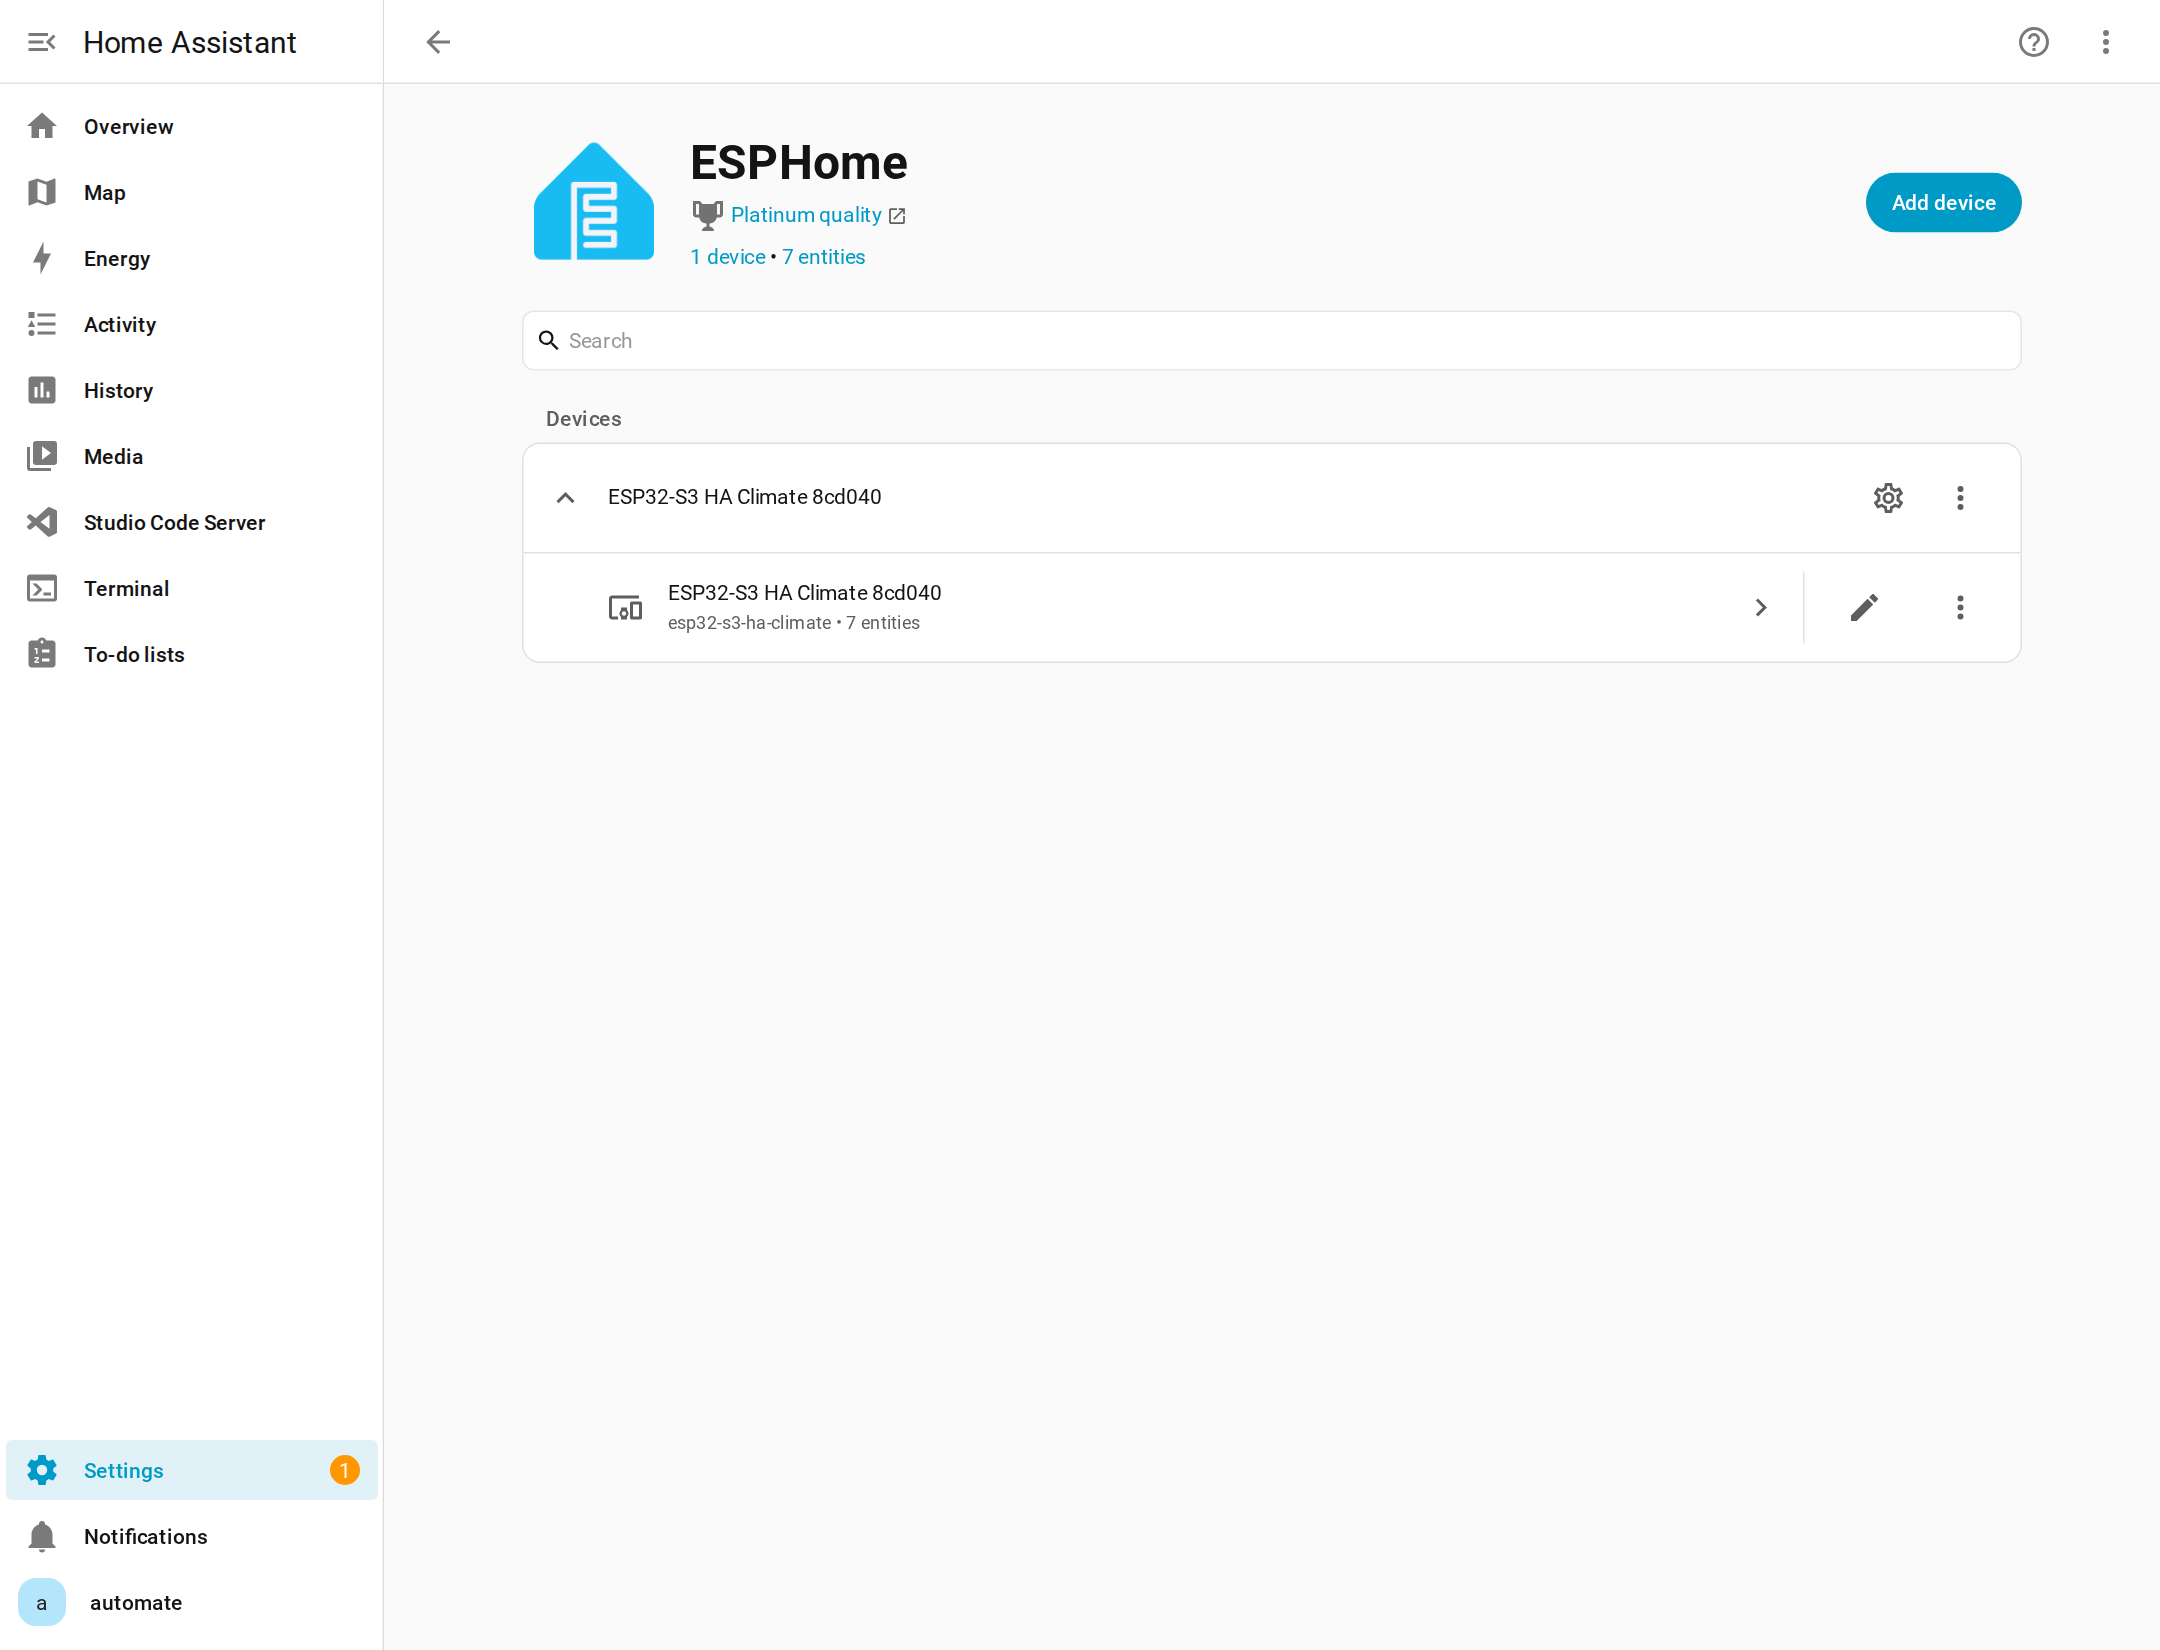
ESPHome after adopt — one device, seven entities.
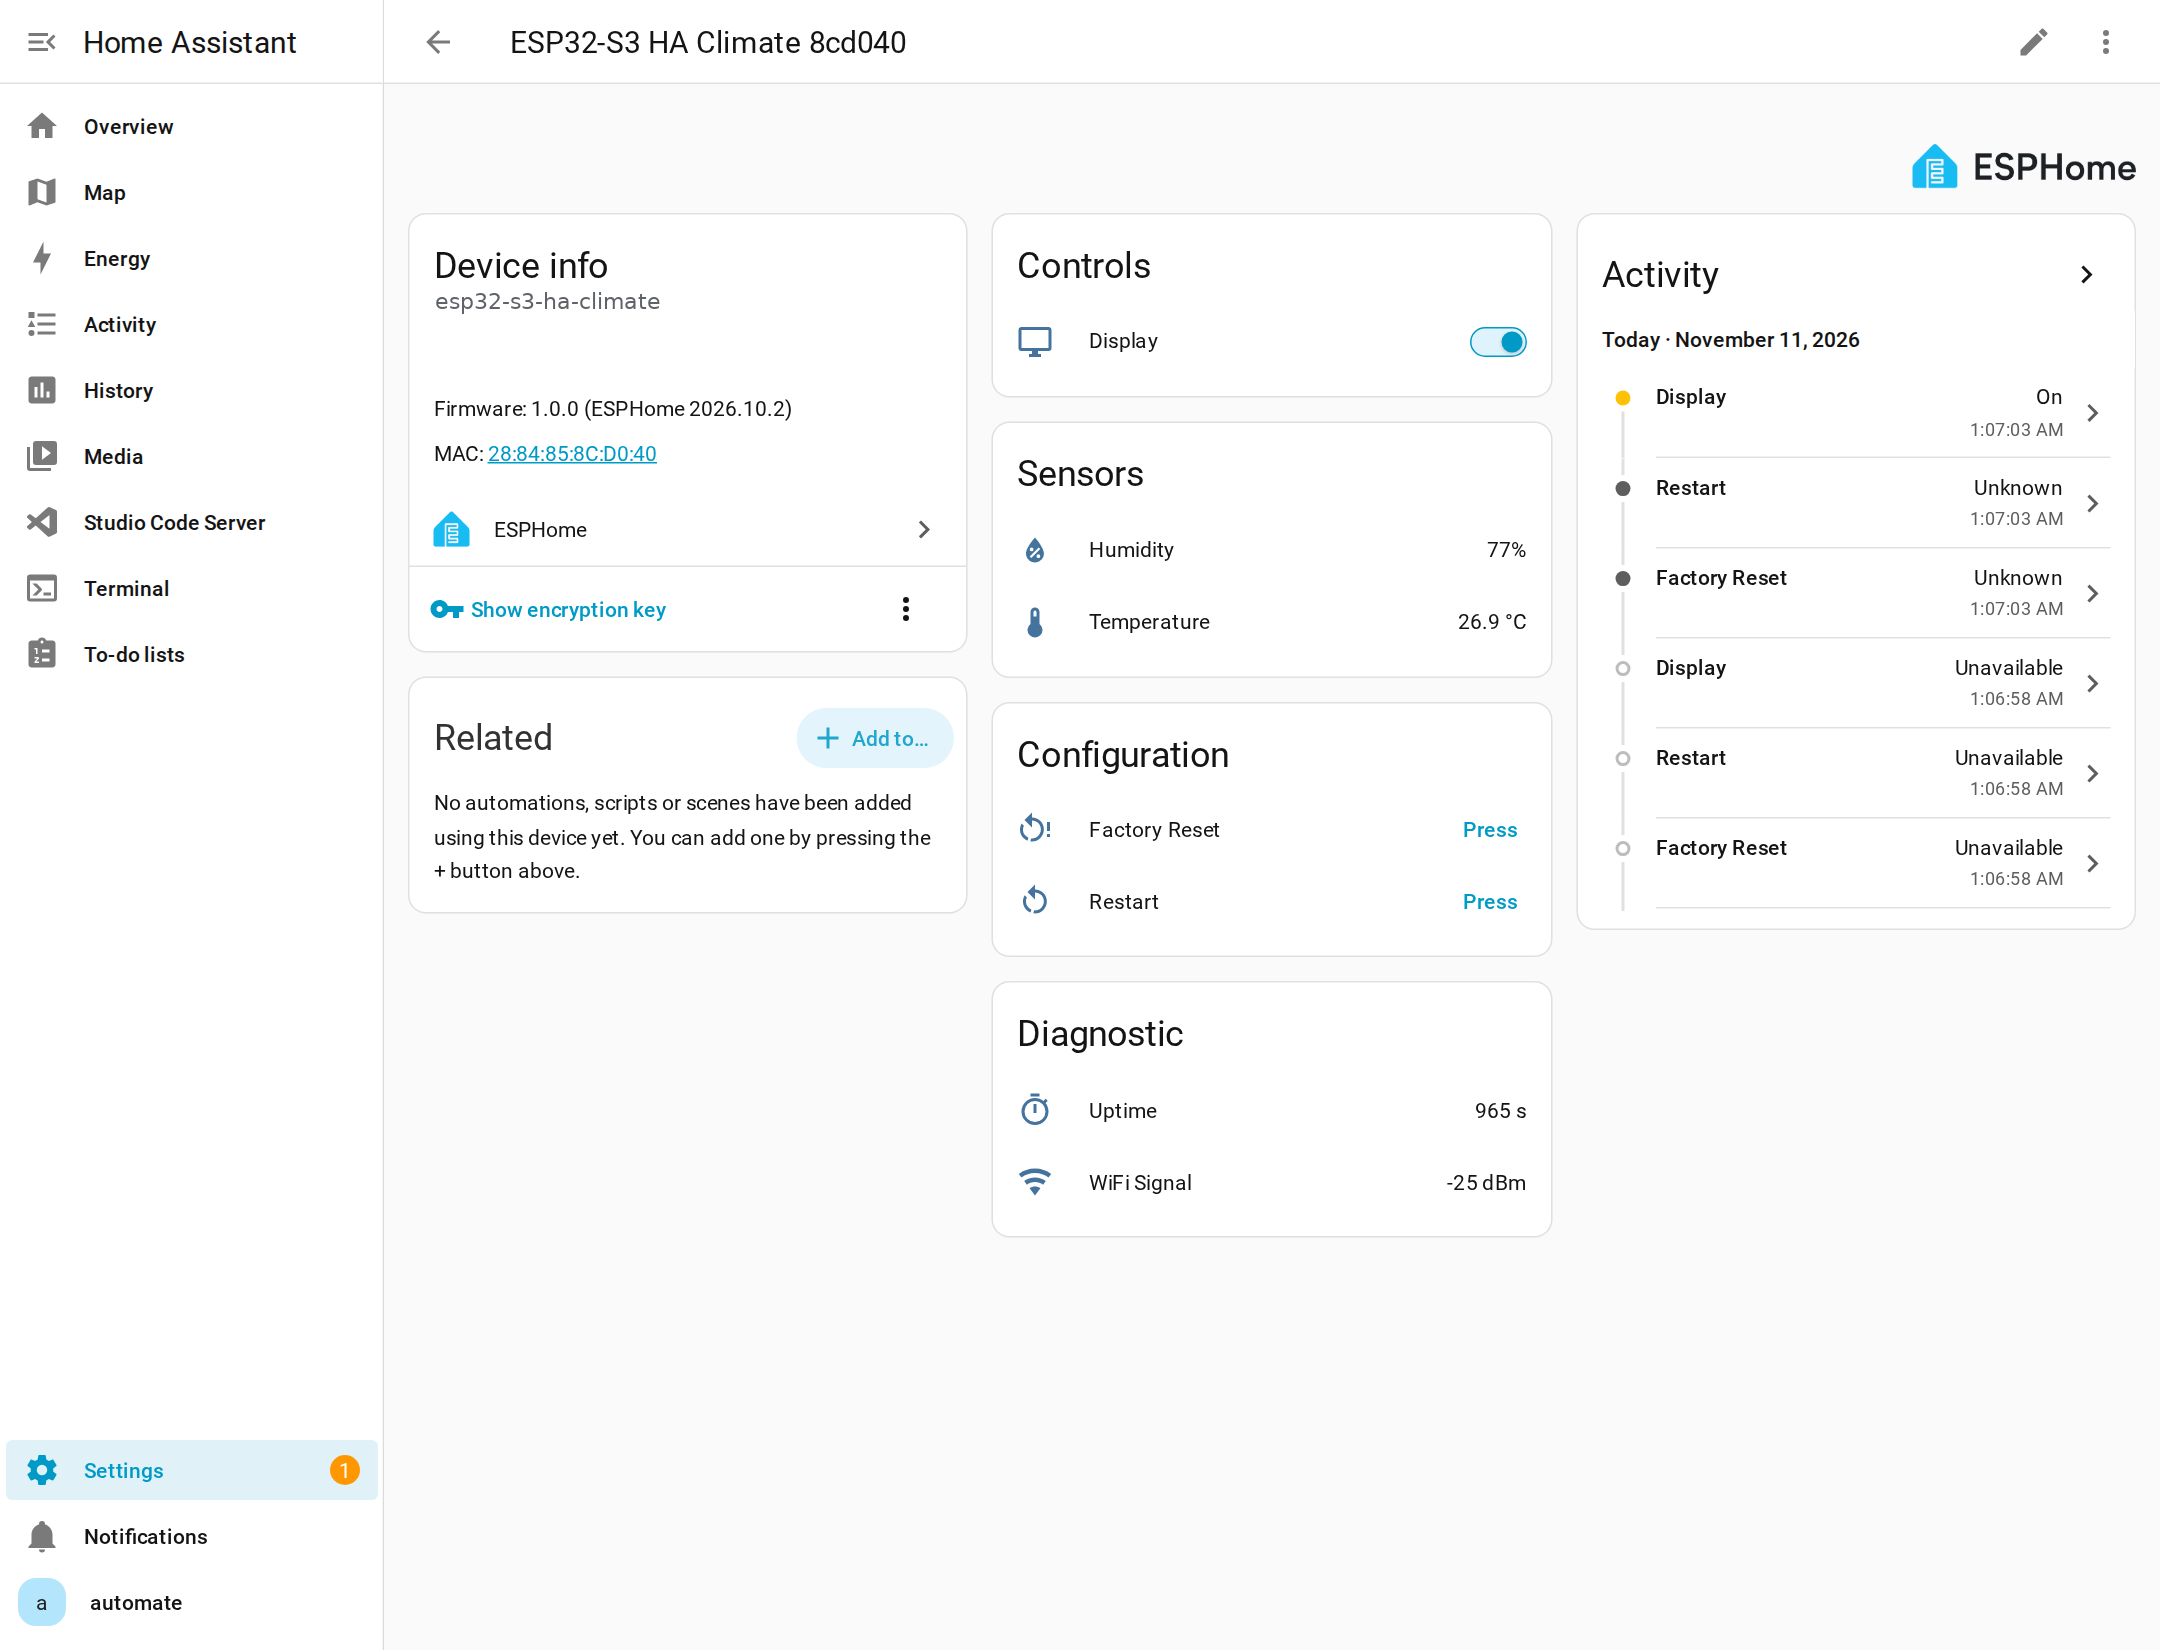
Device page: Display switch, temperature / humidity, Factory Reset / Restart, Wi‑Fi signal and uptime.
When Home Assistant is connected, the serial log shows an API client (your IP will differ):
[D][api.connection:2816]: aioesphomeapi (192.169.…
Test it
| Test | What to do | Expected result |
|---|---|---|
| Readings | Breathe gently on the SHT40 | Humidity jumps on the screen and in Home Assistant within about 10 seconds |
| Display | Turn Display off in Home Assistant | Screen goes dark; turn it back on and the panel lights again |
| Reboot | Press RST, or unplug the board briefly | Reconnects on its own; readings page stays up (no QR flash) |
| Factory reset | Hold BOOT for 5 seconds, then let go | Device restarts and shows the QR code again |
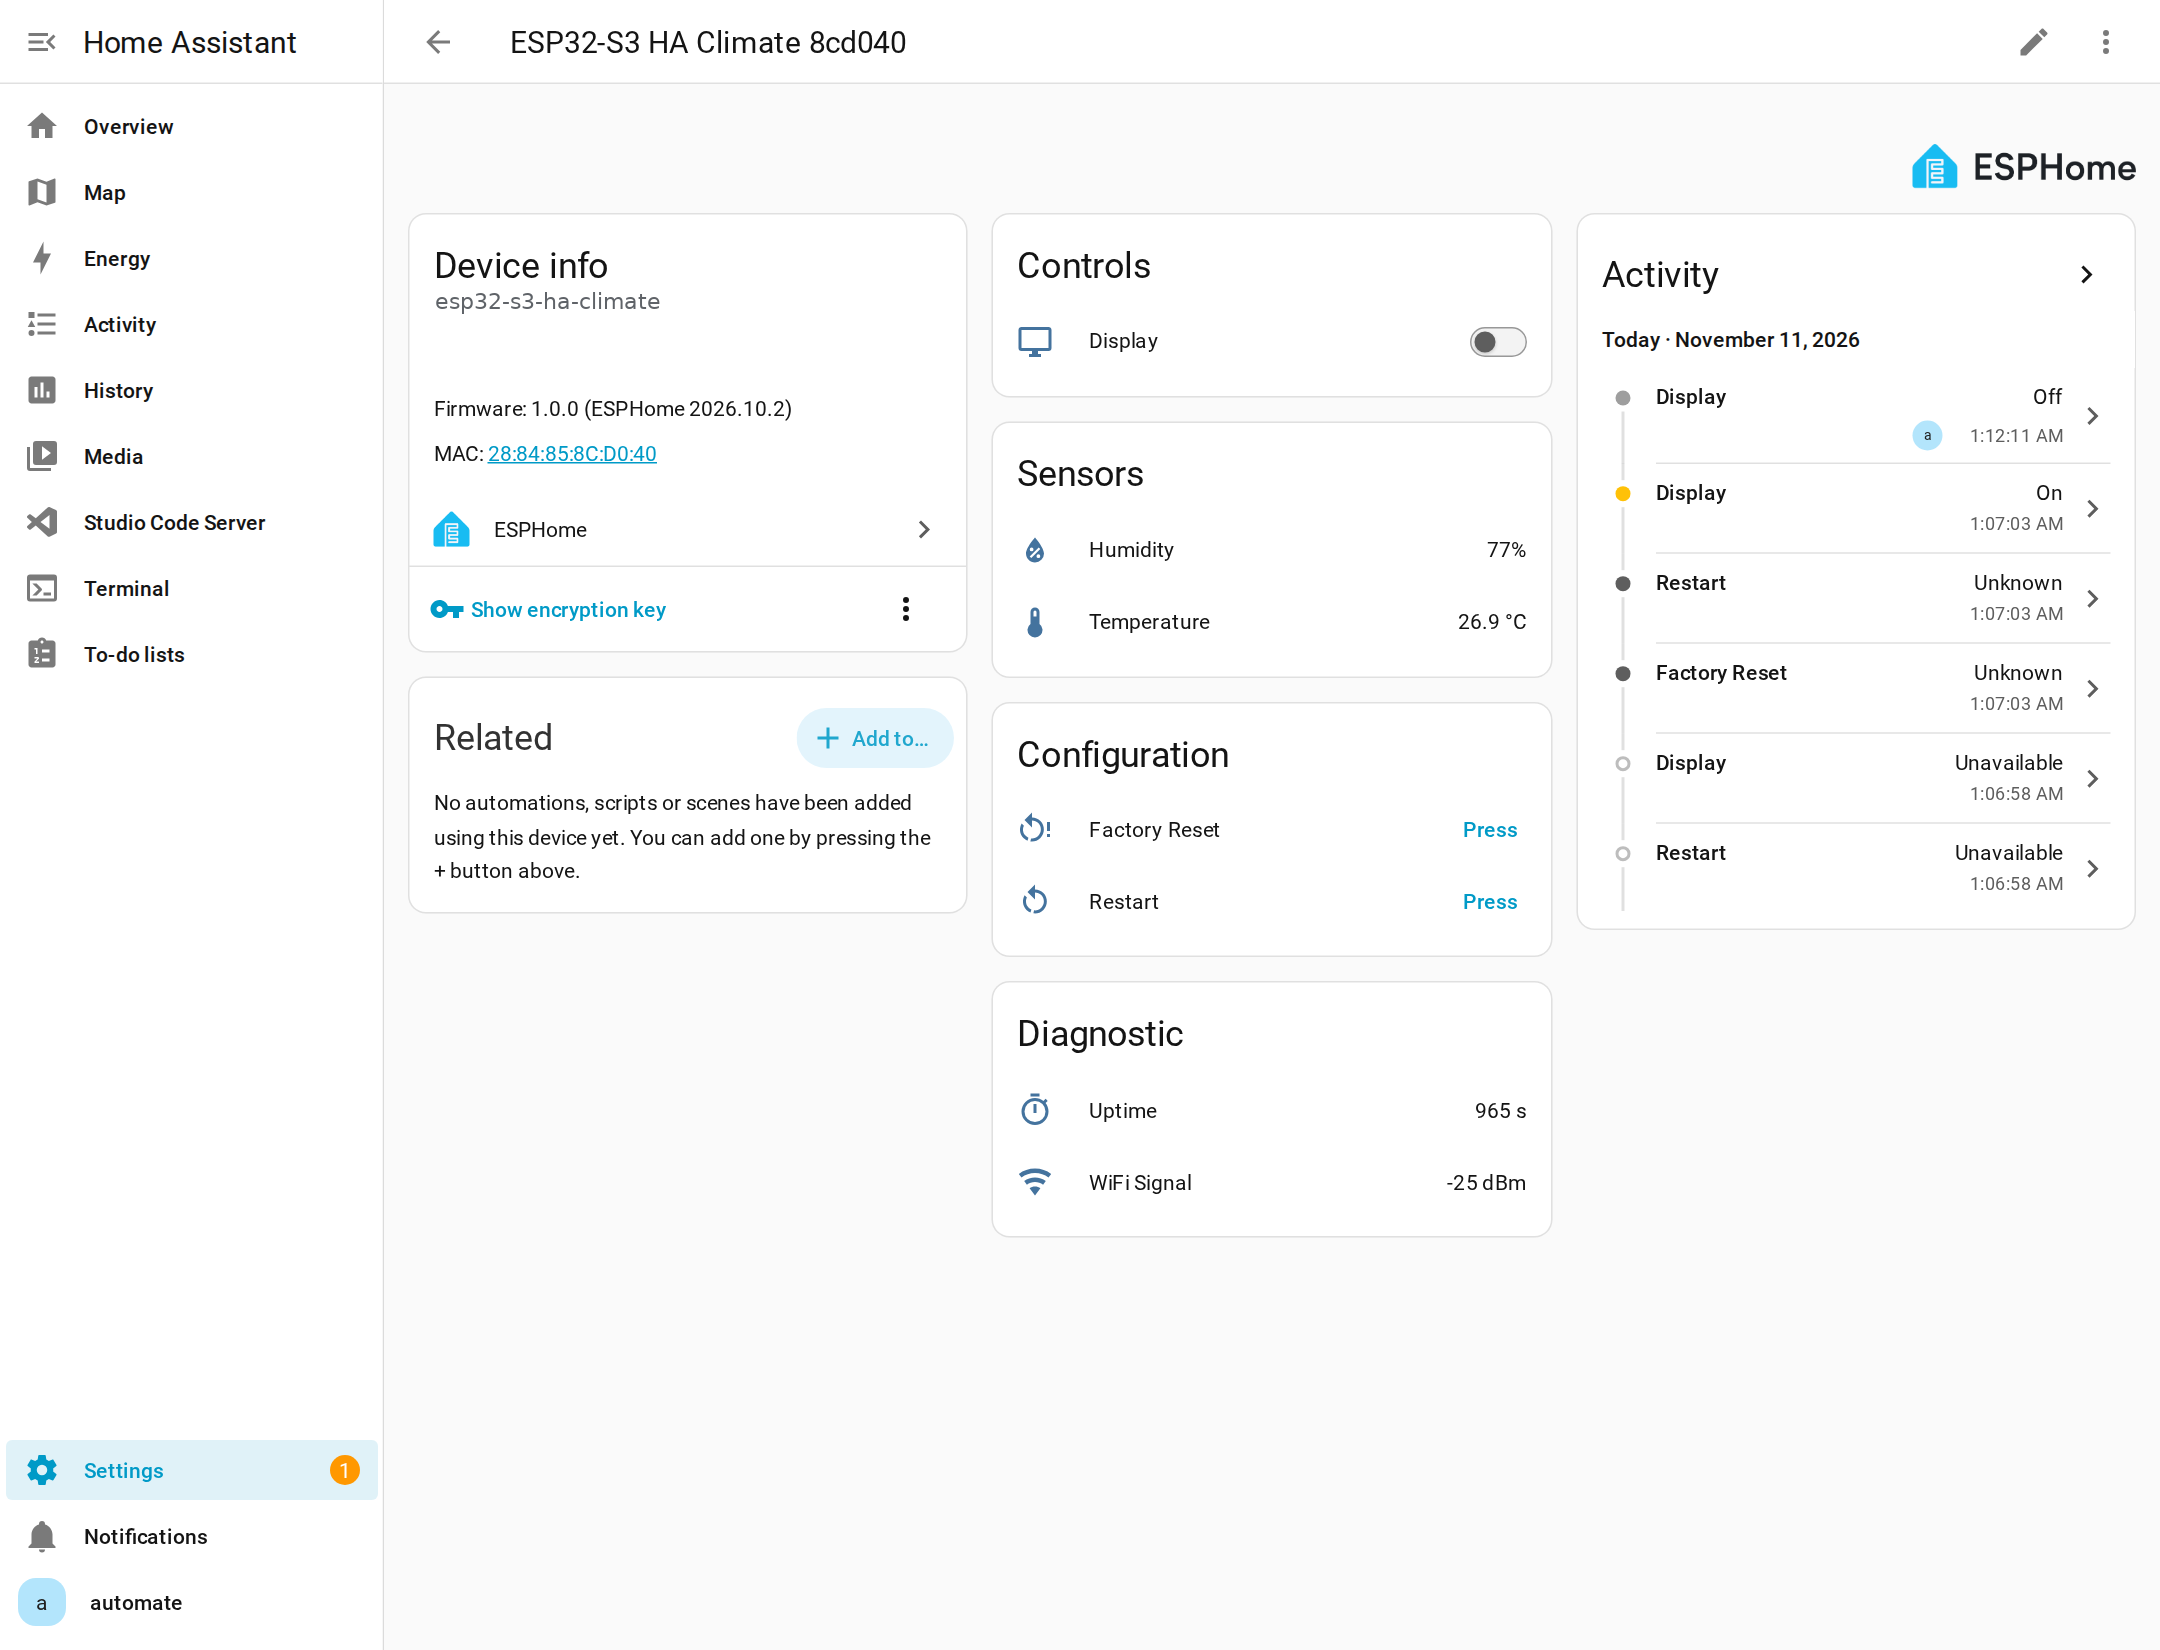
Display test — Display off in Home Assistant; the TFT backlight goes dark on the desk.
After a factory reset, Home Assistant marks the device unavailable. Repeat Connect to your Wi‑Fi, then delete the old device in Home Assistant and add it again, because the reset erased the encryption key it was using.